Iso mount windows 11
Author: s | 2025-04-24

FAQ – Windows 11 Mount ISO Missing. You may encounter some problems while mounting ISO files, Windows 11 Mount ISO Missing is one of them. If you find Windows 11 won’t mount ISO files or the Mount option is FAQ – Windows 11 Mount ISO Missing. You may encounter some problems while mounting ISO files, Windows 11 Mount ISO Missing is one of them. If you find Windows 11 won’t mount ISO files or the Mount option is

Windows 11 Mount ISO Slow
24H2, you can use a professional tool like EaseUS OS2Go and download the Windows 11 24H2 ISO file directly from the Microsoft official website to force the Windows 11 2024 update.2. Is Windows 11 ISO free?Yes, you can have Windows 11 download free 64-bit. Whether you have a product key or not, downloading a Windows 11 ISO will never cost anything, and there are 3 ways to do so: using EaseUS OS2Go, downloading from Microsoft, and using the Windows Media Creation Tool.3. Can I directly Install Windows from ISO file?Yes, you can. You need to mount or extract the ISO file. Right-click on the ISO file and select Mount. A virtual bootable disk will be created. Double-click on it to see its contents, and double-click setup.exe to launch Windows setup.4. How to make a Windows bootable USB?To make a Windows bootable USB, you can use the Windows Media Creation tool and use third-party bootable USB creator like EaseUS OS2Go and Rufus.
How to Mount ISO on Windows 11 and 8 3rd party ISO Mount
Warranty.Once the download completes you can use the Verify your download option to ensure the integrity of the file.Note: See the Windows 11 device specifications for upgrade requirements and supported features. Certain features require additional hardware. We also recommend that you visit your PC’s manufacturer website for information about updated drivers and hardware compatibility.Installation instructions (DVD):Locate the folder where you downloaded the Windows 11 ISO to.To use Windows Disk Image Burner to create the installation DVD, right-click on the ISO file and select Properties . Under the "General tab", click "Change..." where it says, "Opens with:" and select Windows Explorer. Select Apply . This will enable the Burn disc image to display when you right-click on the ISO file.To use a third-party DVD burning program, you can right-click on the ISO file and select Open with .Installation instructions (ISO):If you want to install Windows 11 directly from the ISO file without using a DVD or USB flash drive, you can do so by mounting the ISO file. This will perform an upgrade of your current operating system to Windows 11.To mount the ISO file:Go to the location where you downloaded the ISO file. Then, right-click the ISO file and select Properties .On the "General" tab, click "Change…" where it says, “Opens with:" and select Windows Explorer for the program you would like to use to open ISO files and select Apply .Right-click the ISO file and select Mount .This will create a “virtual” bootable disc. Double-click on it to viewcannot mount windows 11 .iso . Commands to mount and disc
To learn about how to create ISO Windows 10. But before creating ISO files, please make sure you have a license to install Windows 10.Note: Creating an ISO image from a DVD/CD is easy but could cost a few minutes, even over an hour, depending on the size of the disc and the speed of your computer.How to Burn ISO to Disc?When you need to burn ISO to disc? There are two situations:Situation 1: Use a disc to install the software or operating system onto another machine.Situation 2: Install an operating system and need to use a disc to boot a system.In this situation, burning an ISO to a physical disc is very useful.Windows 7, 8, and 10 all have a feature for burning an ISO image to disc built right.Burning an ISO to disc is a piece of cake. All you have to is inserting a writable optical disc, right-clicking the ISO image, and then selecting the Burn disk image command.How to Mount ISO?On Windows 8 and 10, Windows offers a built-in way to mount ISO disc files. However, you need a third-party tool to mount the ISO image if you are using Windows 7.Here I take mounting ISO in Windows 8 and 10 for example.There methods to mount ISO in Windows 8 and 10:Method 1: Double-click the created ISO file to mount it. Please pay attention that this won’t work if you have ISO files associated with another program on your system.Method 2: Right-click the ISO file and then select the Mount option.Method 3: Select the file in File Explorer and then click the Mount button under the Disk Image Tools tab on the ribbon.Following one of the three methods, you can mount the ISO file and see it as a drive under This PC.But do you know how to eject it? Ejecting the ISO file is also quite easy. To do that, you just need to right-click the drive and then select the Eject option to unmount the ISO file when you are done. About The Author Position: Columnist Vicky is a website editor who has been. FAQ – Windows 11 Mount ISO Missing. You may encounter some problems while mounting ISO files, Windows 11 Mount ISO Missing is one of them. If you find Windows 11 won’t mount ISO files or the Mount option is FAQ – Windows 11 Mount ISO Missing. You may encounter some problems while mounting ISO files, Windows 11 Mount ISO Missing is one of them. If you find Windows 11 won’t mount ISO files or the Mount option isMounting ISO Windows 11 Not Working? Enable It in
The other software mentioned above Gizmo Drive is also free software that lets you mount different image files like ISO files, NRG, BIN, IMG, and CUE. What makes Gizmo Drive stand out is that you can mount multiple types of files simultaneously, can mount password-protected images to a virtual hard drive, and create the encrypted hard drive images here. Furthermore, Gizmo Drive also can mount and unmount files with Windows Shell and Command-Line. It reportedly works well on Windows 10 as well.So, these are a few of the software you can use to mount your ISO images. All of these are free and thus serve best for personal usage. Do let us know via comments if you want to add some more to the list. Download it here.Did I miss any?NOTE: You can also free download Windows 11 Enterprise virtual machine from Microsoft.Shiwangi loves to dabble with and write about computers. Creating a System Restore Point first before installing new software, and being careful about any third-party offers while installing freeware is recommended.Windows 11 Mount ISO Slow
The XPS Viewer Feature on Demand (FOD) component allows you to read, copy, print, sign, and set permissions for XPS documents. This article explains installing the XPS Viewer in Windows 10 and 11.Installing the “XPS Document Writer” via the classic Windows Features dialog (i.e., OptionalFeatures.exe) doesn’t install the XPS Viewer. They’re two different components.The XPS Viewer FOD component can be installed using different methods. Follow one of the options below.Method 1: Using SettingsOpen Settings → System → Optional features.Click “View features.”In the “Add an optional feature” dialog, type xps.Select the “XPS Viewer” checkbox, and click Next.On the next screen, click Install.The above steps are for Windows 11.On Windows 10, follow the steps below:Open Settings, System.Click “Optional features”.Note: If “XPS Viewer” is not already installed, it won’t appear in the “Installed Features” listingClick “Add a feature.”Type xpsSelect the “XPS Viewer” checkbox.Click “Install.”Method 2: Using DISMTo install the XPS Viewer using DISM, ensure the system is connected to the internet. And then, run the following commands from the admin Command Prompt:dism /online /remove-capability /capabilityname:XPS.Viewer~~~~0.0.1.0dism /online /add-capability /capabilityname:XPS.Viewer~~~~0.0.1.0The above commands uninstall XPS Viewer and reinstall XPS Viewer by downloading the source files from Windows Update.Method 3: Using DISM (using CAB file) offlineMethods 1 and 2 require internet access to download the FOD packages. To install the XPS Viewer or other FOD packages on a computer that’s offline (i.e., with no internet access), you must use the .cab file. The FOD .cab files will be available in the Windows FOD ISO.The download links for the Language and Optional Features ISOs are below:Windows 11 Language and Optional Features ISO (Source)22621.1.220506-1250.ni_release_amd64fre_CLIENT_LOF_PACKAGES_OEM.iso (for Windows 11 22H2 and 23H2.)26100.1.240331-1435.ge_release_amd64fre_CLIENT_LOF_PACKAGES_OEM.iso (for Windows 11 24H2.)Windows 10, version 2004 (and later) Features on Demand #1 ISO (Link Source)19041.1.191206-1406.vb_release_amd64fre_FOD-PACKAGES_OEM_PT1_amd64fre_MULTI.isoInstructionsDownload the appropriate FOD ISO and mount the ISO. To mount the ISO, right-click on it and click “Mount”. The cab file name for the XPS Viewer is mentioned below:XPS Viewer – FOD InfoFeature name: XPS ViewerCapability name: XPS.Viewer~~~~0.0.1.0CAB file name: Microsoft-Windows-Xps-Xps-Viewer-Opt-Package~31bf3856ad364e35~amd64~~.cabNoteThe above CAB file will be present in the root folder of the Windows 10 FOD ISO. Whereas in the Windows 11 FOD ISO, this file is located under the LanguagesAndOptionalFeatures folder.Suppose the FOD ISO’s mounted drive-letter is H:\. To install the XPS Viewer FOD component, run the following command:Windows 11dism /online /add-package /packagepath:"H:\LanguagesAndOptionalFeatures\Microsoft-Windows-Xps-Xps-Viewer-Opt-Package~31bf3856ad364e35~amd64~~.cab"Windows 10dism /online /add-package /packagepath:"H:\Microsoft-Windows-Xps-Xps-Viewer-Opt-Package~31bf3856ad364e35~amd64~~.cab"You’ll see the following output:Deployment Image Servicing and Management toolVersion: 10.0.19041.844Image Version: 10.0.19045.3086Processing 1 of 1 - Adding package Microsoft-Windows-Xps-Xps-Viewer-Opt-Package~31bf3856ad364e35~amd64~~10.0.19041.1[==========================100.0%==========================]The operation completed successfully.That’s it!One small request: If you liked this post, please share this?One "tiny" share from you would seriously help a lot with the growth of this blog.Some great suggestions:Pin it!Share it to your favorite blog + Facebook, RedditTweet it!So thank you so much for your support. It won't take more than 10 seconds of your time. The share buttons are right below. :)How to Mount ISO on Windows 11 and 8 3rd party ISO Mount
Windows 11 hardware:reg.exe delete "HKLM\SOFTWARE\Microsoft\Windows NT\CurrentVersion\AppCompatFlags\CompatMarkers" /f 2>NULreg.exe delete "HKLM\SOFTWARE\Microsoft\Windows NT\CurrentVersion\AppCompatFlags\Shared" /f 2>NULreg.exe delete "HKLM\SOFTWARE\Microsoft\Windows NT\CurrentVersion\AppCompatFlags\TargetVersionUpgradeExperienceIndicators" /f 2>NULreg.exe add "HKLM\SOFTWARE\Microsoft\Windows NT\CurrentVersion\AppCompatFlags\HwReqChk" /f /v HwReqChkVars /t REG_MULTI_SZ /s , /d "SQ_SecureBootCapable=TRUE,SQ_SecureBootEnabled=TRUE,SQ_TpmVersion=2,SQ_RamMB=8192,"reg.exe add "HKLM\SYSTEM\Setup\MoSetup" /f /v AllowUpgradesWithUnsupportedTPMOrCPU /t REG_DWORD /d 1Step 4. Mount the Windows ISO FileRight-click on the Windows.iso file and select Mount. (or double-click on the “Windows.iso” file to directly open it)Then, explore the contents of the mounted ISO file and double click at “setup.exe” to start the installation of Windows 11.Step 5. Install Windows 11 24H2Click Next to proceed with Windows 11 installationWait for the installer to check for updates and when it finishes click Install to upgrade your system to Windows 11 24H2 without losing your files and settings.The Windows 11 24H2 upgrade will start, despite the fact that it says “Installing Windows Server”. Sit back and wait for the installation to complete without interrupting it. The computer will restart several times during the installation.When the installation is complete, your system will enter Windows with all files and settings intact.Step 6. Finalize the InstallationAfter the installation, go to Start > Settings > Windows Update, and check for any available updates. Install them to ensure your system is fully up-to-date.Step 7: To verify that the Windows 11 version 24H2 is installed:Press the Win + R keys to open the ‘Run’ command box. Type “winver” and hit Enter.Windows activationAfter the upgrade, Windows needs to be activated. Please contact our support team at [email protected]and provide the necessary access details. This will allow us to complete the activation process efficientlycannot mount windows 11 .iso . Commands to mount and disc
Fixed: Windows 10 No Option Mount ISO Files I have a Windows 10 PC and when I right click on .ISO files, there is usually “Mount” as an option on the list. But today, the “Mount” disappeared from the context menu. How can I add it back? I might install some apps to my computer recently.In Windows 7, users need to install an ISO mounter software for creating virtual CD drive. Luckily, Windows 8 and Windows 10 come with the function of ISO mounting. However, a lot of users have reported the issue of “Windows 10 mount ISO missing” or “ISO files not showing Windows 10”. When people right-click on an ISO file, the “Mount” option is missing from the list. In this article, we will introduce the solutions to fix Windows 10 no option mount ISO.Method 1. Restore ISO Mount Option in Windows 10/8After you install a third-party burning software, you may find the Mount option missing from the context menu when you right-click on an ISO file. Fortunately, it can be restored easily in Windows 10/8 in 4 steps.Step 1. Open File Explorer, then navigate to the folder containing the ISO file.Step 2. Right-click on the ISO file, then click Properties.Step 3. In the General tab of Properties dialog, click Change button next to Open with.Step 4. Select Windows Explorer from the pop-up list, then click OK > Apply to save the change.Now, the Mount option shall appear on the right-click list. The ISO files are associated with. FAQ – Windows 11 Mount ISO Missing. You may encounter some problems while mounting ISO files, Windows 11 Mount ISO Missing is one of them. If you find Windows 11 won’t mount ISO files or the Mount option is FAQ – Windows 11 Mount ISO Missing. You may encounter some problems while mounting ISO files, Windows 11 Mount ISO Missing is one of them. If you find Windows 11 won’t mount ISO files or the Mount option is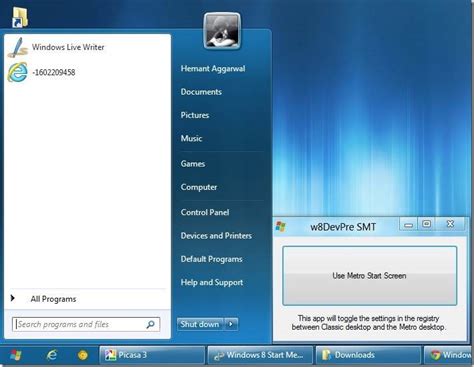
Mounting ISO Windows 11 Not Working? Enable It in
Windows 11.Langkah 3. Jika aplikasi Microsoft PC Health Check sudah menyatakan bahwa perangkat memenuhi syarat, silahkan kamu buka kembali aplikasi Windows 11 Installation Assistant dan klik Accept and Install. Langkah 4. Silahkan ikuti proses update dimana aplikasi tersebut akan melakukan downloading file yang diperlukan kemudian mulai memperbarui Windows 11 secara otomatis. Bagi kamu yang sudah terbiasa dengan metode update via Windows 10 Update Assistant, langkah ini sudah tidak asing lagi, bedanya kini kamu harus mendownload Microsoft PC Health Check untuk memastikan persyaratan Windows 11 terpenuhi. Melalui In Place UpgradeSalah satu metode yang paling saya suka adalah metode via Inplace Upgrade karena kita bisa menyimpan file ISO dari Windows 11 untuk kita gunakan nanti jika kita perlukan kembali. Untuk langkah ini kamu cukup lakukan beberapa langkah berikut. Langkah 1. Pertama silahkan kamu download file ISO dari Windows 11 24H2, langkahnya bisa kamu cek pada halaman : Cara Download File ISO Windows 11 24H2Langkah 2. Setelah file ISO kamu download, silahkan kamu buka / mount file tersebut. Langkah 3. Selanjutnya silahkan kamu klik pada setup dan setelah aplikasi proses setup wizard terbuka, silahkan kamu klik Next dan ikuti proses sepeti biasa. Dengan ketiga langkah diatas, harusnya jika perangkat kamu sudah memenuhi persyaratan Windows 11, maka Windows 11 versi 24H2 akan terinstall tanpa ada masalah. Namun jika ternyata perangkat tidak mendukung, kamu akan mendapatkan notifikasi seperti pada gambar keempat diatas atau gambar berikut jika kamu melakukan metode in place upgrade tanpa tambahan metode bypass. Selain tiga cara diatas, kamu juga sebenarnya bisa menggunakan aplikasi Media Creation Tools dimana dengan aplikasi tersebut kamu bisa memperbarui sistem secara langsung atau mendownload file ISO terlebih dahulu. Untuk langkahnya kamu bisa ikuti langkah berikut : Cara Download File ISO Windows 11 23H2 Dengan Media Creation ToolsNah itulah beberapa langkah resmi yang bisa kamu lakukan untuk mendapatkan WindowsWindows 11 Mount ISO Slow
Paste following code to it: Code: wpeinitpowercfg /s 8c5e7fda-e8bf-4a96-9a85-a6e23a8c635cX:\Scripts\WinSetup.cmd The first line is the default command to initialize networking. In second line, we set a High Performance power plan to speed up Windows installation. In last line, we execute the batch file created in step 2.6.When computer is booted from WinPE media, the contents of WinPE will be copied to RAM disk X. This is why we can use the path X:\Scripts on last command line, there being no need to find out the drive letter for volume containing the Scripts folder.2.8 In an elevated PowerShell, enter following command to save changes to WinPE:Dismount-WindowsImage -Path C:\Mount -Save Part Three Make WinPE ISO3.1 Open an elevated ADK Deployment and Imaging Tools Environment as told in step 1.3.3.2 Enter following command to create WinPE ISO:MakeWinPEMedia /ISO D:\WPEx64 F:\WinPEx64.isoChange path D:\WPEx64 to D:\WPEx86 if creating a 32-bit WinPE ISO. Path F:\WinPEx64.iso is the path and name of the ISO file that will be created. Part Four Partition USB flash drive4.1 Plug in an at least 8 GB USB lash drive. Open an elevated PowerShell, start Windows Disk Partitioning utility with command DISKPART.Enter command LIST DISK to show all attached disks, find out the disk ID for your USB Flash Drive. In my case now, the USB is DISK 3: Be careful, absolutely sure that you find out correct Disk ID! In following step, the selected disk will be wiped clean, and new partitions will be created. Selecting wrong disk may cause Windows or data disks being formatted, all data lost.4.2 Still in DISKPART, run following commands one by one. In first command, replace X (disk ID) with actual Disk ID for your USB flash drive:select disk Xcleancreate partition primary size=1024format quick fs=fat32 label="Boot"assigncreate partition primaryformat quick fs=ntfs label="Setup"assign4.3 Quit DISKPART with command EXIT. Your USB flash drive is now correctly partitioned, containing a 1 GB partition Boot, and partition Setup which occupies the rest of the USB: Part Five Create bootable USB install media5.1 Mount the WinPE ISO image created in Step 3.2 as a virtual CD / DVD drive (right click, select Mount). Copy its contents, all files and folders, to partition Boot on USB.5.2 Mount a Windows 11 ISO image as a virtual CD / DVD drive (right click, select Mount). Copy its contents, all files and folders, to partition Setup on USB.That's it! You have now a bootable USB flash. FAQ – Windows 11 Mount ISO Missing. You may encounter some problems while mounting ISO files, Windows 11 Mount ISO Missing is one of them. If you find Windows 11 won’t mount ISO files or the Mount option is FAQ – Windows 11 Mount ISO Missing. You may encounter some problems while mounting ISO files, Windows 11 Mount ISO Missing is one of them. If you find Windows 11 won’t mount ISO files or the Mount option isHow to Mount ISO on Windows 11 and 8 3rd party ISO Mount
Explained here by me. Four Ways to Open ISO File in Windows 7 1. Software For Compression: -The compression utility simply is used to compress the files by combining them. All the files that you need to compressed The files are selected first and then right click is pressed. How can I mount ISO in Windows 7?How to Mount ISO Image in Windows 7 using Virtual CloneDrive. 1.Download and Install the software from here. 2. Right Click on the ISO Image file as you wish to mount and select mount (Virtual CloneDrive (Drive letter)). 3. Now You can see the new Virtual Drive in the explorer (My computer). For Example, you can see the Step to follow. Is there iso file for Windows 7?An ISO file can be used to restore a disc exactly to the original version. Windows 7 includes a utility called Windows Disc Image Burner that can burn ISO images to CDs and DVDs. The utility is located in the WindowsSystem32 directory and has the filename isoburn.exe.Comments
24H2, you can use a professional tool like EaseUS OS2Go and download the Windows 11 24H2 ISO file directly from the Microsoft official website to force the Windows 11 2024 update.2. Is Windows 11 ISO free?Yes, you can have Windows 11 download free 64-bit. Whether you have a product key or not, downloading a Windows 11 ISO will never cost anything, and there are 3 ways to do so: using EaseUS OS2Go, downloading from Microsoft, and using the Windows Media Creation Tool.3. Can I directly Install Windows from ISO file?Yes, you can. You need to mount or extract the ISO file. Right-click on the ISO file and select Mount. A virtual bootable disk will be created. Double-click on it to see its contents, and double-click setup.exe to launch Windows setup.4. How to make a Windows bootable USB?To make a Windows bootable USB, you can use the Windows Media Creation tool and use third-party bootable USB creator like EaseUS OS2Go and Rufus.
2025-04-22Warranty.Once the download completes you can use the Verify your download option to ensure the integrity of the file.Note: See the Windows 11 device specifications for upgrade requirements and supported features. Certain features require additional hardware. We also recommend that you visit your PC’s manufacturer website for information about updated drivers and hardware compatibility.Installation instructions (DVD):Locate the folder where you downloaded the Windows 11 ISO to.To use Windows Disk Image Burner to create the installation DVD, right-click on the ISO file and select Properties . Under the "General tab", click "Change..." where it says, "Opens with:" and select Windows Explorer. Select Apply . This will enable the Burn disc image to display when you right-click on the ISO file.To use a third-party DVD burning program, you can right-click on the ISO file and select Open with .Installation instructions (ISO):If you want to install Windows 11 directly from the ISO file without using a DVD or USB flash drive, you can do so by mounting the ISO file. This will perform an upgrade of your current operating system to Windows 11.To mount the ISO file:Go to the location where you downloaded the ISO file. Then, right-click the ISO file and select Properties .On the "General" tab, click "Change…" where it says, “Opens with:" and select Windows Explorer for the program you would like to use to open ISO files and select Apply .Right-click the ISO file and select Mount .This will create a “virtual” bootable disc. Double-click on it to view
2025-03-30The other software mentioned above Gizmo Drive is also free software that lets you mount different image files like ISO files, NRG, BIN, IMG, and CUE. What makes Gizmo Drive stand out is that you can mount multiple types of files simultaneously, can mount password-protected images to a virtual hard drive, and create the encrypted hard drive images here. Furthermore, Gizmo Drive also can mount and unmount files with Windows Shell and Command-Line. It reportedly works well on Windows 10 as well.So, these are a few of the software you can use to mount your ISO images. All of these are free and thus serve best for personal usage. Do let us know via comments if you want to add some more to the list. Download it here.Did I miss any?NOTE: You can also free download Windows 11 Enterprise virtual machine from Microsoft.Shiwangi loves to dabble with and write about computers. Creating a System Restore Point first before installing new software, and being careful about any third-party offers while installing freeware is recommended.
2025-03-27The XPS Viewer Feature on Demand (FOD) component allows you to read, copy, print, sign, and set permissions for XPS documents. This article explains installing the XPS Viewer in Windows 10 and 11.Installing the “XPS Document Writer” via the classic Windows Features dialog (i.e., OptionalFeatures.exe) doesn’t install the XPS Viewer. They’re two different components.The XPS Viewer FOD component can be installed using different methods. Follow one of the options below.Method 1: Using SettingsOpen Settings → System → Optional features.Click “View features.”In the “Add an optional feature” dialog, type xps.Select the “XPS Viewer” checkbox, and click Next.On the next screen, click Install.The above steps are for Windows 11.On Windows 10, follow the steps below:Open Settings, System.Click “Optional features”.Note: If “XPS Viewer” is not already installed, it won’t appear in the “Installed Features” listingClick “Add a feature.”Type xpsSelect the “XPS Viewer” checkbox.Click “Install.”Method 2: Using DISMTo install the XPS Viewer using DISM, ensure the system is connected to the internet. And then, run the following commands from the admin Command Prompt:dism /online /remove-capability /capabilityname:XPS.Viewer~~~~0.0.1.0dism /online /add-capability /capabilityname:XPS.Viewer~~~~0.0.1.0The above commands uninstall XPS Viewer and reinstall XPS Viewer by downloading the source files from Windows Update.Method 3: Using DISM (using CAB file) offlineMethods 1 and 2 require internet access to download the FOD packages. To install the XPS Viewer or other FOD packages on a computer that’s offline (i.e., with no internet access), you must use the .cab file. The FOD .cab files will be available in the Windows FOD ISO.The download links for the Language and Optional Features ISOs are below:Windows 11 Language and Optional Features ISO (Source)22621.1.220506-1250.ni_release_amd64fre_CLIENT_LOF_PACKAGES_OEM.iso (for Windows 11 22H2 and 23H2.)26100.1.240331-1435.ge_release_amd64fre_CLIENT_LOF_PACKAGES_OEM.iso (for Windows 11 24H2.)Windows 10, version 2004 (and later) Features on Demand #1 ISO (Link Source)19041.1.191206-1406.vb_release_amd64fre_FOD-PACKAGES_OEM_PT1_amd64fre_MULTI.isoInstructionsDownload the appropriate FOD ISO and mount the ISO. To mount the ISO, right-click on it and click “Mount”. The cab file name for the XPS Viewer is mentioned below:XPS Viewer – FOD InfoFeature name: XPS ViewerCapability name: XPS.Viewer~~~~0.0.1.0CAB file name: Microsoft-Windows-Xps-Xps-Viewer-Opt-Package~31bf3856ad364e35~amd64~~.cabNoteThe above CAB file will be present in the root folder of the Windows 10 FOD ISO. Whereas in the Windows 11 FOD ISO, this file is located under the LanguagesAndOptionalFeatures folder.Suppose the FOD ISO’s mounted drive-letter is H:\. To install the XPS Viewer FOD component, run the following command:Windows 11dism /online /add-package /packagepath:"H:\LanguagesAndOptionalFeatures\Microsoft-Windows-Xps-Xps-Viewer-Opt-Package~31bf3856ad364e35~amd64~~.cab"Windows 10dism /online /add-package /packagepath:"H:\Microsoft-Windows-Xps-Xps-Viewer-Opt-Package~31bf3856ad364e35~amd64~~.cab"You’ll see the following output:Deployment Image Servicing and Management toolVersion: 10.0.19041.844Image Version: 10.0.19045.3086Processing 1 of 1 - Adding package Microsoft-Windows-Xps-Xps-Viewer-Opt-Package~31bf3856ad364e35~amd64~~10.0.19041.1[==========================100.0%==========================]The operation completed successfully.That’s it!One small request: If you liked this post, please share this?One "tiny" share from you would seriously help a lot with the growth of this blog.Some great suggestions:Pin it!Share it to your favorite blog + Facebook, RedditTweet it!So thank you so much for your support. It won't take more than 10 seconds of your time. The share buttons are right below. :)
2025-04-18