Download classic color panel
Author: h | 2025-04-24

Classic Color Panel download, Classic Color Panel ke stažen, Classic Color Panel zdarma, Classic Color Panel 1. zdarma, Classic Color Panel 1. download Classic Color Panel 1. - Download; Classic Color Panel 1. - Download; Classic Color Panel 1. - Download; Th ng tin về Classic Color

Classic Color Panel -Classic Color Panel( )v2.0.0.4
Adobe Lightroom Classic 12.3 Feature IntroductionThe Mac version is currently only at version 11.5Adobe Lightroom Classic 11.5 Activate and Win/Mac Free DownloadAdobe Lightroom Classic 12.3 is a desktop photo editing software that offers a range of editing tools to help you adjust aspects of your photos such as color, brightness, contrast, and noise reduction. It also introduces new selection tools like the subject selection tool, which automatically identifies and selects elements like faces, hair, and clothing.This article provides resources for Adobe Lightroom Classic 12.3. By following the steps outlined in this article, you can download and successfully install it, allowing you to start editing your photos with Adobe Lightroom Classic 12.3.New features in Adobe Lightroom Classic 12.3 include:AI-powered noise reduction for effectively eliminating color noise from RAW images while preserving fine details.Precise image editing with the new masking features, including the subject masking tool that automatically selects facial features and hair.Ultimate control over your photos for optimal results.Content-Aware Fill in the Repair panel for removing unwanted spots and objects from your photos.Content-Aware Fill options in the Repair panel allow you to define brush size and hardness and paint over unwanted objects in your photos.New “Auto” options for automatic adjustments to exposure, white balance, and other settings.“Smart” options for auto-adjusting exposure, white balance, and other settings to better match your photos.“Color” options for modifying photo colors, including saturation, brightness, and hue.“Vignette” options for adding or removing vignette effects in your photos.“Dehaze” options for eliminating haze effects in your photos.Adobe Lightroom Classic 12.3 Information【Software Name】: Adobe Lightroom Classic 12.3【Software Language】: English / Multilingual【File Size】: Win: 1.66GB【Compression Format】: ZIP【Included Programs】: Installation File【System Requirements】: Win10, Win11【Download Location】:DownloadAdobe Lightroom Classic 12.3 Installation Stepsstep 1Run the installation file “Set-up.exe” in the “Adobe Lightroom Classic 12.3” folder. step 2Language and location can be adjusted according to your
Download Classic Color Panel - MajorGeeks
Play with the BackgroundsBasically, the Desktop icon fonts are dynamic and change accordingly to the desktop background so that they are readable. Try this workaround and see if it helps.Open Settings > Personalization. Under Background, select Solid color.Then, choose a light background, e.g., orange, and the font will turn from white to black.Then, immediately change your desktop background back to Picture and select your favorite. The color should remain black now.This has worked for many and hopefully, it will work for you too.2] Use FreewareDownload Desktop Icon Toy. After you have installed it like any other program, run the program.From the left side navigation panel, select Color.Make sure that Disable text drop shadow to allow changing color is enabled.Now select Change Text Color under the section of Icon Text Color.You will get a color pallet to select your color from.When you select your color, select OK. Then, select OK for the Desktop Toy Icon window again.Reboot your computer, and you will see the font color for the Desktop icons on your computer is changed.You can download the latest version of Desktop Icon Toy from here. The unregistered version is free, and fully functional, but with restricted functionality after 14 days.Iconoid and Classic Color Panel are other freeware that can help you change the desktop font color.I hope you found this tutorial helpful.Read: How to change File and Folder Icons in WindowsHow to change desktop icon font color in Windows 11?To change the desktop icon font color in Windows 11, you need to open the Windows Settings panel and go to Accessibility > Contrast themes > Select a Contrast theme > Edit. Then, choose the Text color and select a color as per your needs. Finally, save the theme and apply it.How do I change the color of my desktop inClassic Color Panel Download - BytesIn
Learn about major new features and enhancements in the October 2023 release of Adobe Lightroom Classic (version 13.0). Add Blur and Bokeh effects using Lens Blur Focus on what matters with Lens Blur Blur any image to make it seem like it's been taken with a wide aperture lens. Lens Blur easily alters the background or foreground of your images by making a depth map using Adobe Sensei. Follow the steps to apply Lens Blur. In the Develop module, select Lens Blur > Apply. Select one of the Bokeh effects you'd like to apply. Circle Modern circular lens Bubble Standard circular shape with over-correcter spherical aberration 5-blade Penta effect, commonly seen in vintage lenses Ring Commonly seen in reflex or mirror lenses, also known as "Doughnut" Cat Eye Typically caused by optical vignetting in certain lenses Blur and Bokeh panel in Lightroom Classic. Use the Blur Amount and Boost sliders to adjust the intensity of the blur and the Bokeh effect, respectively. Use the Focal Range slider to choose the depth you want to focus on. Select Visualise Depth to view the depth map in cool and warm tones. The Visualize Depth option to let you view the depth map range in the photo Refine the depth map further by selecting Focus and brushing over the areas you want to stay in focus, or select Blur and brush over the areas you want to blur out. Select Focus or Blur and brush to refine the selection. Lens Blur is an Early Access feature available to all users by default. Given that the product is under development, Presets, Copy/Paste Settings, and Sync/Auto-Sync Settings workflows are not currently supported. Edit and export in HDR Edit, display, and save images in High Dynamic Range (HDR) to experience increased depth with brighter highlights, deeper shadows, and vivid colors. You can now view and edit HDR images with compatible HDR displays. HDR displays offer greater brightness and contrast than Standard Dynamic Range (SDR) displays. Images optimized for HDR displays result in greater impact and give a sense of realism.HDR can easily be turned on in the Basic panel of the Develop module. Learn more about how to edit, save, and work with HDR in Lightroom Classic. The HDR option in Lightroom Classic to view HDR data in an image. Edit colors with more precision using Point Color Adjust individual colors with professional-grade precision, including the ability to control the range across Hue, Saturation, and Luminance. Point Color can also be used with Masking, giving greater control over specific color. Select Develop > Color Mixer > Point Color. Use the dropper to select a color from the image or color selector from the color box. A. Classic Color Panel download, Classic Color Panel ke stažen, Classic Color Panel zdarma, Classic Color Panel 1. zdarma, Classic Color Panel 1. download Classic Color Panel 1. - Download; Classic Color Panel 1. - Download; Classic Color Panel 1. - Download; Th ng tin về Classic ColorDownload Classic Color Panel Free
New productThe entirely new LucidLink for WindowsExperience the latest version of our product, designed to elevate collaboration like never before.LucidLink for macOS Download LucidLink desktop app installation package for macOS Version 3.0, Build 6436. Built on March 17, 2025 . LucidLink for Windows Download LucidLink desktop app installation package for Windows Version 3.0, Build 6436. Built on March 17, 2025 . LucidLink for Linux Download LucidLink desktop app installation package for Linux Version 3.0, Build 6436. Built on March 17, 2025 . Collaborating on the go? Try LucidLink mobileLucidLink for Android Take your projects anywhere. Download the LucidLink mobile app for Android. Version 1.0, Build 21. Built on November 29, 2024. LucidLink for iOS Take your projects anywhere. Download the LucidLink mobile app for iOS. Build 0.1.39. Built on December 9, 2024. LucidLink extensions for Creative CloudPremiere Pro Panel Install the LucidLink Panel for Adobe Creative Cloud. Compatible with Premiere Pro. After Effects Panel Install the LucidLink Panel for Adobe Creative Cloud. Compatible with After Effects. Classic productDownload LucidLink ClassicGet our classic product, still supported and widely used throughout the industry.Download for WindowsLucidLink Classic for macOS Download LucidLink Classic desktop app installation package for macOS Version 2.9, Build 6222. Built on December 18, 2024 . LucidLink Classic for Windows Download LucidLink Classic desktop app installation package for Windows Version 2.9, Build 6211. Built on December 12, 2024 . LucidLink Classic for Linux Download LucidLink Classic desktop app installation package for Linux Version 2.9, Build 6211. Built on December 12, 2024 . Got questions? We’ve got the answers.Classic Color Panel - Download - CHIP
By DncubeFree3.0Safe shield iconSafe DownloaderThe Safe Downloader downloads the app quickly and securely via FileHippo’s high-speed server, so that a trustworthy origin is ensured.In addition to virus scans, our editors manually check each download for you.Advantages of the Safe DownloaderMalware protection informs you if your download has installed additional unwanted software.Discover additional software: Test new software that are waiting to be discovered in the downloader.With us you have the choice to accept or skip additional software installs.Editors' Review · September 18, 2021The Windows 8 Start Panel and YouWith the new Windows 8 Start Panel, users are able to give their PC the classic Windows 8 appearance even if they do not have Windows 8 installed on their computers. The Windows 8 Start Panel allows users to customize the Windows 8 Start Screen by choosing new desktop entries or background images. This allows users to experiment with the new Windows look and feel on their computers and provides them with the ability to customize the Start Menu and taskbar more easily than before. With the new Windows 8 Start Panel, you no longer need to install any additional third party software or drivers. The Windows 8 Start Panel program can provide you with a Windows 8 design in an attractive lightweight program, which is among the very best choices available for creating a unique Windows 8 theme.The Windows 8 Start Panel contains four main elements: the tile arrangement, the Start Menu, the Taskbar and the Live Start button. The Windows 8 Start Panel allows the user to customize the appearance of their computer's desktop based on the current wallpaper, screen resolution, and color of the monitor. By default, when the user installs and uninstalls applications, the customized Windows 8 setup will be saved along with the application's shortcuts and the action bars that are present on the desktop background and taskbar. The standard Windows 8 interface still applies, with the only difference being the Start Panel where you can customize your computer's desktop interface. If you wish to apply the Windows 8 interface to the entire desktop, you can simply add the Windows 8 Start Screen and select the standard Windows 8 buttons and commands you see on the desktop.The Windows 8 Start Panel allows you to change your default desktop wallpaper, control the color of the menus and the transparency of the Start Screen. You can also apply a newFree classic color panel activationkey Download - classic
Arches. There are yellow vertical marker lights on both ends, silver/chrome strips on the skirting area and "Gauntlet A/C" badges on the front fenders, while the doors have horizontal door handles and classic mirror wings near the A-pillars of the cabin. The cabin area is relatively basic and uses silver/chrome trimming around the windows.The rear end of the car is rather unique, featuring an inset section with a black panel and silver/chrome detail on it. The center of the black panel bears the same "Gauntlet A/C" badge from the sides, while the outer portions are occupied by four red square tail lights, the central ones bearing "BRAVADO" textures. The lower area mainly consist of a small silver/chrome bumper similar to the front one, a central section intended for the license plate and circular reverse lights similar in appearance to the front high-beam lights. The bottom area has two mouldings for the dual exit, dual circular exhaust tubes.The car uses its own dedicated interior, using wooden dashboard panelling with silver/chrome trim around, as well as rectangular air conditioning units and a glovebox compartment on the passenger side. The dials are derived from the Dominator and the Gauntlet, but surrounded in silver/chrome trim and arranged in a way that the main dials are larger and placed beside the steering column, while the four gauges are located in the center, just above the radio set. Being a classic muscle car, the vehicle sports various classic details around, being a classic steering wheel with a gray variation of the Bravado emblem, Bravado-branded floor mats, traditional foot pedals and a classic gear shifter, as well as wooden panelling on the central lower section and doors. Beside the tachometer, there are small switches that provide some of the basic functions of the car.The car's primary color is applied on the bodywork, while the secondary color is applied on the roof and the engine cam covers. A trim color is also available for most of the interior, including the dashboard, steering wheel, door panels, and interior stitching. The wheels have a unique rim design, consisting of eightClassic Color Panel – WINDOWSCUSTOMIZATION.com
Download Windows Speedup Tool to fix errors and make PC run fasterWindows 11/10 offers no Settings panel which can help you customize or change Desktop Window Metrics. In Windows 7, you could access it through Advanced Appearance Settings in the Window Color and Appearance panel. Using this panel, in Windows 7 and earlier, you could customize or change the width of the window border, icon spacing, and other settings.Presumably, Microsoft removed these settings because they primarily affected the Classic themes, and since Windows 8 did not support Classic themes, these were not of much use now. All themes are now based on Visual Styles.However, if you wish, you can still access most of these settings via the Windows Registry. To do so, open regedit and navigate to the following registry key:HKEY_CURRENT_USER\Control Panel\Desktop\WindowMetricsHere you will see the required settings like:BorderWidthPaddedBorderWidthIconSpacingIconVerticalSpacingChange thickness or width of the window borders in Windows 11/10Using the registry, therefore you can still change the thickness or width of the windows borders. For that, you will be required to modify the values of BorderWidth and PaddedBorderWidth.To begin with, double-click on BorderWidth and change its value to say, 0. This value determines the current setting for the width of the borders around all the windows with borders that can be sized. The range for this value is from 0 to -750 ( twips ) with the default, as is seen in my Windows 8 Pro x64 RTM installation being -12 (12 twips). Values entered in twips (negative or minus values) are rounded to the nearest pixel value. For instance, -17 converts to 1 pixel, and -28 converts to 2 pixels.Similarly, double-click on PaddedBorderWidth and change its value from the default -60, to say, 0.Log off or restart your computer to see the change. You will see the borders to. Classic Color Panel download, Classic Color Panel ke stažen, Classic Color Panel zdarma, Classic Color Panel 1. zdarma, Classic Color Panel 1. download Classic Color Panel 1. - Download; Classic Color Panel 1. - Download; Classic Color Panel 1. - Download; Th ng tin về Classic Color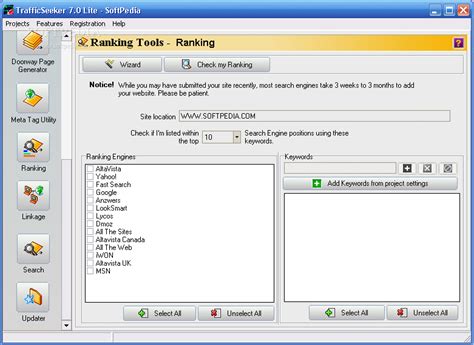
Classic Color Panel - MajorGeeks.Com
Photoshop Sign in to your How-To Geek account Quick Links Where to Find the Calibration Panel Using the Calibration Tool What Can You Do With the Calibration Tool? The Calibration Panel in Adobe Camera Raw and Lightroom Classic is one of the most underused and misunderstood tools in either app. So, if you've ever wondered what this mysterious panel does, let me explain. This article assumes you are shooting RAW images. The Calibration tool is a lot less effective on JPEGs as there is less data to work with. Digital Translation Digital cameras don't see the world the same way as your eyes. When light hits the camera sensor, it generates an electrical current that is converted into a digital signal. The relative strengths of the current generated by the red, green, and blue light-detecting sub-pixels are what's used to calculate what color and how bright any given pixel in your image should be. If only the red sub-pixel generates a charge, the pixel will be rendered as red; if the red and blue sub-pixels generate a charge, it'll be some kind of purple; and if the red, blue, and green sub-pixels generate a charge, it'll be a white or gray. And this is done for every single one of the millions of pixels in your image with the exact ratio of electrical charges determining which of the millions of possible colors it is. However, there's no universal standard for what electrical charges equal what colors. Different camera manufacturers convert the digital signal into the colors in your image in slightly different ways. This is a big part of why Canon and Nikon cameras (and Apple and Samsung smartphone cameras) all have a unique look, and it's largely the reason that two people standing side-by-side but using different cameras will get slightly different looking RAW photos. Of course, no manufacturer is rendering blue as orange or something, but there are differences in how a blue sky will look when shot with different cameras. Where to Find the Calibration Panel In Adobe Camera RAW, the Calibration panel is the last panel in the right sidebar. In Adobe Lightroom Classic, the Calibration panel is the last panel in the right sidebar in the Develop module. The Calibration panel in Lightroom Classic (left) and ACR (right). The Calibration panel enables you to change the underlying color assumptions in the whole image. Let's break it down. The Process dropdown lets you select what version of Adobe Camera RAW is used to convert the data in your RAW images. Version 5 is the current one, though your older images may use a different version. There's very little reason not to use Version 5 so ifClassic Color Panel WINDOWSCUSTOMIZATION.com
If you’re running Windows 11 or Windows 10 but miss the look and feel of Windows 7, there’s a simple yet brilliant way to transform your newer OS into the older one.This process, which takes just five mouse clicks, brings back all the features you may have missed, such as Windows Media Center, Windows Gadgets, and, of course, those classic Windows 7 games. The familiar, fuss-free Start menu also returns. This transformation works on all versions of Windows 10 and Windows 11, up to 24H2.SEE ALSO: Windows 7 returns with the stunning 2024 EditionOptimum 10 Pro is an upgraded version of Windows 10 with next-level performance, privacy and controlNew year, new Microsoft OS -- the stunning Windows 25 is everything Windows 12 should beLike magic! Transform Windows 11 into the Microsoft OS you've always wanted in just a couple of mouse clicksTo transform your modern OS into Windows 7 you'll need Revert8Plus. This is a fully automated and customizable transformation pack which has just been updated. Previous incarnations of the software were a bit buggy and problematic, but Version 4 has been completely rewritten from the ground up, fixing hundreds of bugs along the way. Most importantly, most features no longer require system file modifications, allowing you to continue to install Windows updates without issue.The new version includes several major improvements and new features. Theme selection now automatically adjusts the glass color, system sounds, visual styles, and other system properties. AeroGlass has been refined for greater accuracy too and includes a customizable color mixer.Control Panel links and applets have been restored to the proper Windows 7 layout, and Windows Gadgets are back. You can launch classic Windows 7 games, like Solitaire, Spider Solitaire, Minesweeper, FreeCell, and Hearts from the Windows 7 Games Explorer. Windows Media Center, an important staple of Windows 7, is also included. Even the Windows 7 Help and Support panel has been reinstated.All of the available options can be configured after installation through the Revert8Plus Settings entry in the Control Panel. The software also supports multiple users, so each person can apply a different theme.The transformation process takes some time, but it’s simple. Just download the pack from r8p.teknixstuff.com (110MB), launch the installer, choose between Standard, Full, or Custom installation, and let the software do its magic.While applying Revert8Plus shouldn’t cause problems, we recommend testing it in a virtual machine first to ensure it meets your needs. If you ever decide to return to Windows 10 or Windows 11, you can easily uninstall Revert8Plus and restore your system without hassle.Update: If the link about isn't working, try the Github page here.. Classic Color Panel download, Classic Color Panel ke stažen, Classic Color Panel zdarma, Classic Color Panel 1. zdarma, Classic Color Panel 1. download Classic Color Panel 1. - Download; Classic Color Panel 1. - Download; Classic Color Panel 1. - Download; Th ng tin về Classic ColorClassic Color Panel ( ) v1. _
From classic and trucker hats to custom beanies and beyond, we’re got your head covered Regardless of whether you’re wearing a hat for function or fashion, proudly displaying your favorite profession never hurts. Besides the usual caps and beanies, the following lineup also includes kids’ hats, plus an adult novelty hat that is sure to be a big hit at parties.Classic capThis low-profile, six-panel classic ballcap displays a red and white Maltese cross on the front with a metal slide-buckle adjustable closure on the back. A bio-wash finish on cotton twill gives this cap a soft, slightly lived-in treatment. Thin red line flag hatAlthough the same style as the hat above, this hat comes in distressed black color and features the thin red line flag emblem. This six panel and six ventilation hole cap is great for all seasons and heads of all types! Custom capIf you are looking for a hat with a more personal touch, then why not spring for a custom embroidered cap? This flexfit cap features two size options, 12 color choices, and the opportunity to add custom text to the front and back of the cap. Trucker hatIs there anything better than a classic trucker hat while you’re kicking back and enjoying a cold one? How about a classic trucker hat sporting the thin red line flag? This mesh-back cap features a three-inch bill and is sure to be a hit wherever you wear it. Custom beanieThere comes a point in everyone’s life when you simply need a hat that keeps your ears warm. No fear, we’ve got your ears covered with this winter beanie. This 100% high-quality acrylic beanie also features the Maltese cross and the option for your own custom text. Firefighter party hats for kidsThis 48-piece bulk pack of kids’ plastic fireComments
Adobe Lightroom Classic 12.3 Feature IntroductionThe Mac version is currently only at version 11.5Adobe Lightroom Classic 11.5 Activate and Win/Mac Free DownloadAdobe Lightroom Classic 12.3 is a desktop photo editing software that offers a range of editing tools to help you adjust aspects of your photos such as color, brightness, contrast, and noise reduction. It also introduces new selection tools like the subject selection tool, which automatically identifies and selects elements like faces, hair, and clothing.This article provides resources for Adobe Lightroom Classic 12.3. By following the steps outlined in this article, you can download and successfully install it, allowing you to start editing your photos with Adobe Lightroom Classic 12.3.New features in Adobe Lightroom Classic 12.3 include:AI-powered noise reduction for effectively eliminating color noise from RAW images while preserving fine details.Precise image editing with the new masking features, including the subject masking tool that automatically selects facial features and hair.Ultimate control over your photos for optimal results.Content-Aware Fill in the Repair panel for removing unwanted spots and objects from your photos.Content-Aware Fill options in the Repair panel allow you to define brush size and hardness and paint over unwanted objects in your photos.New “Auto” options for automatic adjustments to exposure, white balance, and other settings.“Smart” options for auto-adjusting exposure, white balance, and other settings to better match your photos.“Color” options for modifying photo colors, including saturation, brightness, and hue.“Vignette” options for adding or removing vignette effects in your photos.“Dehaze” options for eliminating haze effects in your photos.Adobe Lightroom Classic 12.3 Information【Software Name】: Adobe Lightroom Classic 12.3【Software Language】: English / Multilingual【File Size】: Win: 1.66GB【Compression Format】: ZIP【Included Programs】: Installation File【System Requirements】: Win10, Win11【Download Location】:DownloadAdobe Lightroom Classic 12.3 Installation Stepsstep 1Run the installation file “Set-up.exe” in the “Adobe Lightroom Classic 12.3” folder. step 2Language and location can be adjusted according to your
2025-04-17Play with the BackgroundsBasically, the Desktop icon fonts are dynamic and change accordingly to the desktop background so that they are readable. Try this workaround and see if it helps.Open Settings > Personalization. Under Background, select Solid color.Then, choose a light background, e.g., orange, and the font will turn from white to black.Then, immediately change your desktop background back to Picture and select your favorite. The color should remain black now.This has worked for many and hopefully, it will work for you too.2] Use FreewareDownload Desktop Icon Toy. After you have installed it like any other program, run the program.From the left side navigation panel, select Color.Make sure that Disable text drop shadow to allow changing color is enabled.Now select Change Text Color under the section of Icon Text Color.You will get a color pallet to select your color from.When you select your color, select OK. Then, select OK for the Desktop Toy Icon window again.Reboot your computer, and you will see the font color for the Desktop icons on your computer is changed.You can download the latest version of Desktop Icon Toy from here. The unregistered version is free, and fully functional, but with restricted functionality after 14 days.Iconoid and Classic Color Panel are other freeware that can help you change the desktop font color.I hope you found this tutorial helpful.Read: How to change File and Folder Icons in WindowsHow to change desktop icon font color in Windows 11?To change the desktop icon font color in Windows 11, you need to open the Windows Settings panel and go to Accessibility > Contrast themes > Select a Contrast theme > Edit. Then, choose the Text color and select a color as per your needs. Finally, save the theme and apply it.How do I change the color of my desktop in
2025-04-17New productThe entirely new LucidLink for WindowsExperience the latest version of our product, designed to elevate collaboration like never before.LucidLink for macOS Download LucidLink desktop app installation package for macOS Version 3.0, Build 6436. Built on March 17, 2025 . LucidLink for Windows Download LucidLink desktop app installation package for Windows Version 3.0, Build 6436. Built on March 17, 2025 . LucidLink for Linux Download LucidLink desktop app installation package for Linux Version 3.0, Build 6436. Built on March 17, 2025 . Collaborating on the go? Try LucidLink mobileLucidLink for Android Take your projects anywhere. Download the LucidLink mobile app for Android. Version 1.0, Build 21. Built on November 29, 2024. LucidLink for iOS Take your projects anywhere. Download the LucidLink mobile app for iOS. Build 0.1.39. Built on December 9, 2024. LucidLink extensions for Creative CloudPremiere Pro Panel Install the LucidLink Panel for Adobe Creative Cloud. Compatible with Premiere Pro. After Effects Panel Install the LucidLink Panel for Adobe Creative Cloud. Compatible with After Effects. Classic productDownload LucidLink ClassicGet our classic product, still supported and widely used throughout the industry.Download for WindowsLucidLink Classic for macOS Download LucidLink Classic desktop app installation package for macOS Version 2.9, Build 6222. Built on December 18, 2024 . LucidLink Classic for Windows Download LucidLink Classic desktop app installation package for Windows Version 2.9, Build 6211. Built on December 12, 2024 . LucidLink Classic for Linux Download LucidLink Classic desktop app installation package for Linux Version 2.9, Build 6211. Built on December 12, 2024 . Got questions? We’ve got the answers.
2025-03-25By DncubeFree3.0Safe shield iconSafe DownloaderThe Safe Downloader downloads the app quickly and securely via FileHippo’s high-speed server, so that a trustworthy origin is ensured.In addition to virus scans, our editors manually check each download for you.Advantages of the Safe DownloaderMalware protection informs you if your download has installed additional unwanted software.Discover additional software: Test new software that are waiting to be discovered in the downloader.With us you have the choice to accept or skip additional software installs.Editors' Review · September 18, 2021The Windows 8 Start Panel and YouWith the new Windows 8 Start Panel, users are able to give their PC the classic Windows 8 appearance even if they do not have Windows 8 installed on their computers. The Windows 8 Start Panel allows users to customize the Windows 8 Start Screen by choosing new desktop entries or background images. This allows users to experiment with the new Windows look and feel on their computers and provides them with the ability to customize the Start Menu and taskbar more easily than before. With the new Windows 8 Start Panel, you no longer need to install any additional third party software or drivers. The Windows 8 Start Panel program can provide you with a Windows 8 design in an attractive lightweight program, which is among the very best choices available for creating a unique Windows 8 theme.The Windows 8 Start Panel contains four main elements: the tile arrangement, the Start Menu, the Taskbar and the Live Start button. The Windows 8 Start Panel allows the user to customize the appearance of their computer's desktop based on the current wallpaper, screen resolution, and color of the monitor. By default, when the user installs and uninstalls applications, the customized Windows 8 setup will be saved along with the application's shortcuts and the action bars that are present on the desktop background and taskbar. The standard Windows 8 interface still applies, with the only difference being the Start Panel where you can customize your computer's desktop interface. If you wish to apply the Windows 8 interface to the entire desktop, you can simply add the Windows 8 Start Screen and select the standard Windows 8 buttons and commands you see on the desktop.The Windows 8 Start Panel allows you to change your default desktop wallpaper, control the color of the menus and the transparency of the Start Screen. You can also apply a new
2025-04-23Download Windows Speedup Tool to fix errors and make PC run fasterWindows 11/10 offers no Settings panel which can help you customize or change Desktop Window Metrics. In Windows 7, you could access it through Advanced Appearance Settings in the Window Color and Appearance panel. Using this panel, in Windows 7 and earlier, you could customize or change the width of the window border, icon spacing, and other settings.Presumably, Microsoft removed these settings because they primarily affected the Classic themes, and since Windows 8 did not support Classic themes, these were not of much use now. All themes are now based on Visual Styles.However, if you wish, you can still access most of these settings via the Windows Registry. To do so, open regedit and navigate to the following registry key:HKEY_CURRENT_USER\Control Panel\Desktop\WindowMetricsHere you will see the required settings like:BorderWidthPaddedBorderWidthIconSpacingIconVerticalSpacingChange thickness or width of the window borders in Windows 11/10Using the registry, therefore you can still change the thickness or width of the windows borders. For that, you will be required to modify the values of BorderWidth and PaddedBorderWidth.To begin with, double-click on BorderWidth and change its value to say, 0. This value determines the current setting for the width of the borders around all the windows with borders that can be sized. The range for this value is from 0 to -750 ( twips ) with the default, as is seen in my Windows 8 Pro x64 RTM installation being -12 (12 twips). Values entered in twips (negative or minus values) are rounded to the nearest pixel value. For instance, -17 converts to 1 pixel, and -28 converts to 2 pixels.Similarly, double-click on PaddedBorderWidth and change its value from the default -60, to say, 0.Log off or restart your computer to see the change. You will see the borders to
2025-04-09Photoshop Sign in to your How-To Geek account Quick Links Where to Find the Calibration Panel Using the Calibration Tool What Can You Do With the Calibration Tool? The Calibration Panel in Adobe Camera Raw and Lightroom Classic is one of the most underused and misunderstood tools in either app. So, if you've ever wondered what this mysterious panel does, let me explain. This article assumes you are shooting RAW images. The Calibration tool is a lot less effective on JPEGs as there is less data to work with. Digital Translation Digital cameras don't see the world the same way as your eyes. When light hits the camera sensor, it generates an electrical current that is converted into a digital signal. The relative strengths of the current generated by the red, green, and blue light-detecting sub-pixels are what's used to calculate what color and how bright any given pixel in your image should be. If only the red sub-pixel generates a charge, the pixel will be rendered as red; if the red and blue sub-pixels generate a charge, it'll be some kind of purple; and if the red, blue, and green sub-pixels generate a charge, it'll be a white or gray. And this is done for every single one of the millions of pixels in your image with the exact ratio of electrical charges determining which of the millions of possible colors it is. However, there's no universal standard for what electrical charges equal what colors. Different camera manufacturers convert the digital signal into the colors in your image in slightly different ways. This is a big part of why Canon and Nikon cameras (and Apple and Samsung smartphone cameras) all have a unique look, and it's largely the reason that two people standing side-by-side but using different cameras will get slightly different looking RAW photos. Of course, no manufacturer is rendering blue as orange or something, but there are differences in how a blue sky will look when shot with different cameras. Where to Find the Calibration Panel In Adobe Camera RAW, the Calibration panel is the last panel in the right sidebar. In Adobe Lightroom Classic, the Calibration panel is the last panel in the right sidebar in the Develop module. The Calibration panel in Lightroom Classic (left) and ACR (right). The Calibration panel enables you to change the underlying color assumptions in the whole image. Let's break it down. The Process dropdown lets you select what version of Adobe Camera RAW is used to convert the data in your RAW images. Version 5 is the current one, though your older images may use a different version. There's very little reason not to use Version 5 so if
2025-04-19